three.js 사용하는 light 는 Object3D 를 상속받은 Light 클래스를 상속받습니다.
Light 의 종류와 특징을 살펴보겠습니다.
💻 AmbientLight
AmbientLight(color: Integer, intensity: Float)
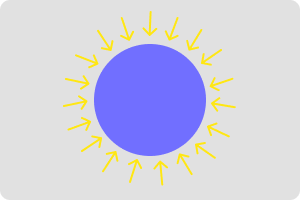
AmbientLight 는 scene 안에 있는 모든 mesh 들 에게 균일하게 적용된다는 특징이 있습니다. 즉 방향이 존재하지 않아(omnidirectional) 모든 물체들이 균일하게 조명을 받습니다.
1
2
3
4
// ...생략...
const ambientLight = new THREE.AmbientLight(0xffffff, 1);
scene.add(ambientLight);
// ...생략...
위 예시는, intensity 가 1 이며, 색이 흰색인 AmbientLight 를 추가하는 코드입니다. 여기서 intensity 는 조명의 강도를 의미합니다.
위 코드를 실행시킨 결과는 아래와 같습니다.

모든 mesh 가 균일하게 조명을 받았음을 볼 수 있습니다.
AmbientLight 는 빛의 반사로 인해 생기는 효과를 재현하기 위해 사용할 수 있습니다. 현실 세계에서는 조명을 받지 않는 부분도 반사에 의해 희미하게 보이는데, AmbientLight 의 intensity 를 조절해 비슷한 효과를 표현할 수 있습니다.
💻 HemisphereLight
HemiSphereLight(skyColor: Integer, groundColor: Integer, intensity: Float)
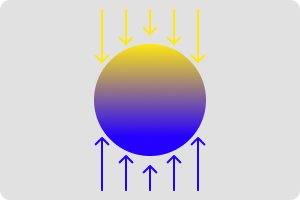
HemisphereLight 는 AmbientLight 와 비슷하게 방향이 존재하지 않지만, 위와 아래에서 비추는 조명의 색이 다른다는 차이점이 있습니다.
1
2
3
4
5
// ...생략...
const skyColor = 0xb1e1ff; // 하늘색
const groundColor = 0xb97a20; // 오렌지 브라운
const hemisphereLight = new THREE.HemisphereLight(skyColor, groundColor, 1);
// ...생략...
위 코드는, 위로부터 오는 조명의 색은 0xb1e1ff 로, 아래에서 오는 조명의 색은 0xb97a20 설정한 HemiSphereLight 의 예시이며, 해당 코드를 실행한 결과는 아래와 같습니다.
scene의 위와 아래의 색이 다른것을 확인할 수 있습니다.
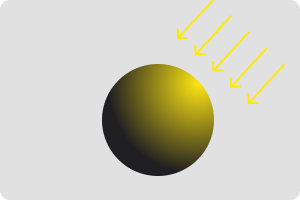
💻 DirectionalLight
DirectionalLight( color : Integer, intensity : Float )
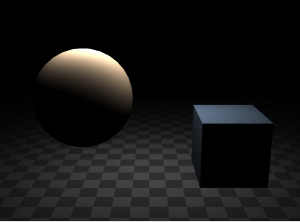
DirectionalLight 는 이름에서도 알 수 있듯이, 방향이 존재하며 해당 방향으로 빛이 나아갑니다. 또한 무한히 먼 거리에서 평행하게 빛이 진행하는 것처럼 생각할 수 있습니다. 이런 특성때문에 태양을 표현할 때 주로 사용이 됩니다.
1
2
3
4
// ...생략...
const directionalLight = new THREE.DirectionalLight(0xffffff, 1);
scene.add(directionLight);
// ...생략...
위는 DirectionalLight 를 추가하기 위한 코드이며, 실행결과는 아래와 같습니다.
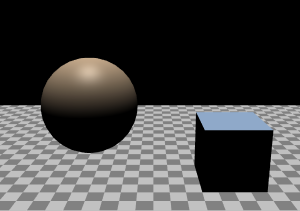
DirectionalLight 에는 target 이라는 Object3D 타입을 갖는 속성이 있는데, 이 속성은 빛의 진행 방향을 결정하는 역할을 합니다. 다시 말해, DirectionalLight 의 방향은 광원의 위치인 position 에서 target 으로의 방향이 됩니다.
DirectionalLight 의 position 초깃값은 (0, 1, 0) 이며, target 의 초기 position 은 (0, 0, 0) 이므로 빛의 진행방향은 위 이미지와 같이 위에서 아래가 됩니다.
1
2
3
4
5
6
7
8
// ...생략...
const directionalLight = new THREE.DirectionalLight(0xffffff, 1);
directionalLight.position.set(0, 10, 0);
directionalLight.target.position.set(-10, 0, 0);

scene.add(directionalLight.target);
scene.add(directionalLight);
// ...생략...
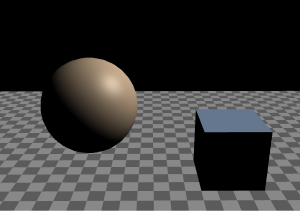
위 코드는, DirectionalLight 의 위치와 target 의 위치를 이동시킨 코드입니다. 바뀐 target 의 위치를 적용하기 위해 scene 에 추가한 것을 볼 수 있습니다.
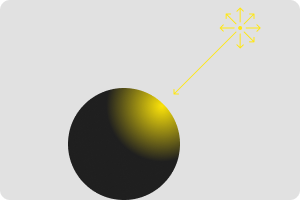
💻 PointLight
PointLight( color : Integer, intensity : Float, distance: Number, decay: Float )
PointLight 는 빛이 한 점에서 모든 방향으로 뻗어나간다는 특징이 있습니다.
주로 전구나 촛불과 같은 광원을 표현하기 위해 사용합니다.
1
2
3
4
5
// ...생략...
const pointLight = new THREE.PointLight(0xffffff, 1);
pointLight.position.set(0, 10, 0);
scene.add(pointLight);
// ...생략...
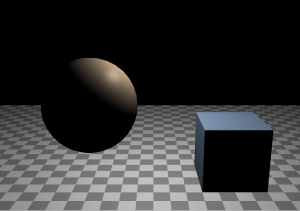
위 코드는 PointLight 를 생성해, 광원의 위치를 (0, 10, 0) 으로 옮긴 코드로 결과는 아래와 같습니다.
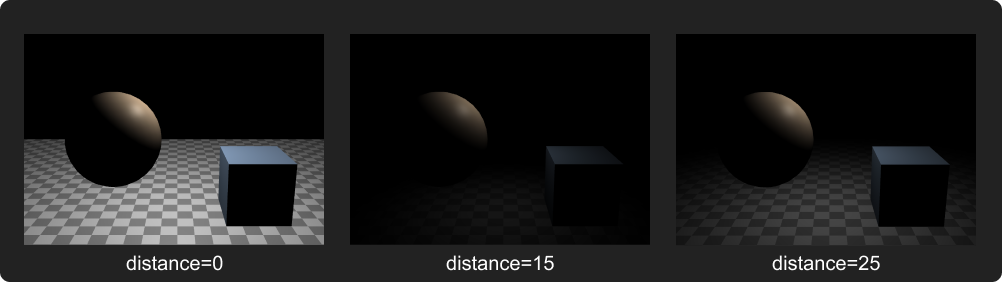
PointLight 에는 지금까지 살펴본 light 와 달리 distance 와 decay 인자를 추가로 받습니다.
distance
빛의 영향이 닿는 거리를 의미하며,0일 경우 무한대로 퍼지며,0이 아닐경우, 설정한 지점까지만 퍼져나갑니다.![point-light-3]()
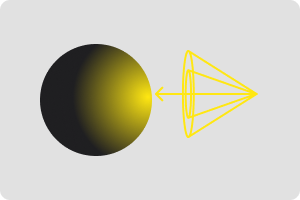
decay
거리에 따라 빛이 흐려지는 정도를 설정하는 옵션으로 기본값은2입니다.
💻 SpotLight
SpotLight( color : Integer, intensity : Float, distance: Number, angle: Radians, penumbra: Number, decay: Float )
SpotLight 는 한 점에서부터 원뿔을 따라, 한 방향으로 나아가는 light 입니다.
원뿔은 내부 원뿔과, 외부 원뿔로 이루어져 있으며, 내부 원뿔에서 밝기가 가장 세고, 외부로 갈 수록 0에 가까워 집니다.
1
2
3
4
5
// ...생략...
const spotLight = new THREE.SpotLight(0xffffff, 1);
scene.add(spotLight);
scene.add(spotLight.target);
// ...생략...
위 코드는 SpotLight 를 생성하는 코드입니다.
SpotLight 도 DirectionalLight 와 비슷하게 방향이 존재함으로 target 을 이용해 방향을 바꿔야 합니다. 따라서 target 을 scene 에 추가했음을 볼 수 있습니다.
SpotLight 는 PointLight 가 받는 인자외에도, angle, penumbra 두 인자를 추가로 받습니다.
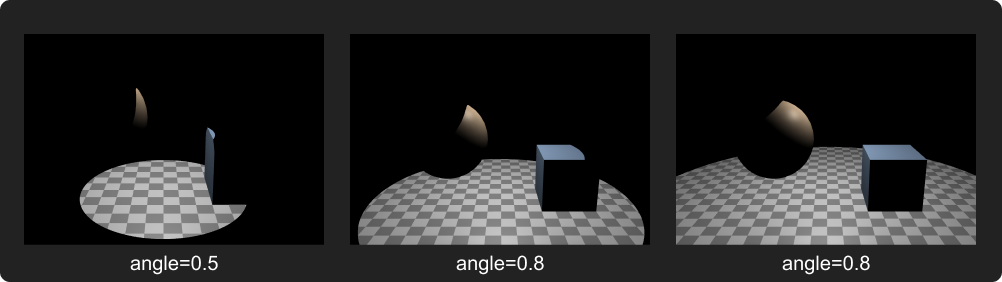
angle
SpotLight의 최대 범위를 지정해주는 속성입니다.
단위는radian이며 기본값은π / 3이며,π / 2보다 크게 설정할 수 없습니다.![spot-light-2]()
penumbra
외부 원뿔에 대한 내부 원뿔의 비율을 설정하는 속성입니다. 즉penumbra의 값이0이면 내부 원뿔과 외부 원뿔의 크기가 같음을 의미하고,1이면 원뿔의 중앙에서 부터 희미해짐을 의미합니다. 만약0.5라면 중앙과 외부 원뿔의 50% 지점에서 부터 흐려지게 됩니다. 기본값은0입니다.![spot-light-3]()

💻 RectAreaLight
RectAreaLight( color : Integer, intensity : Float, width: Float, height: Float )
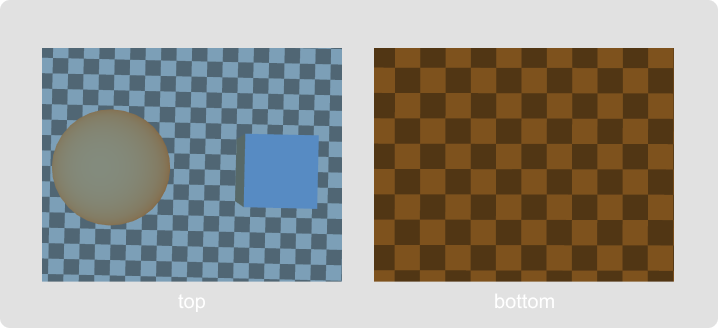
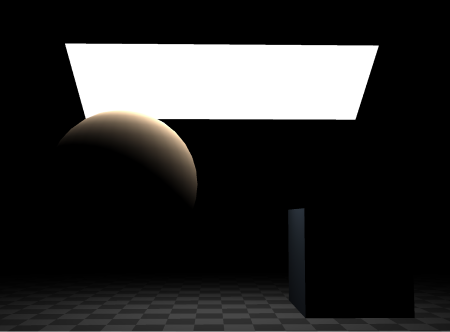
ReactAreaLight 는 직사각형 평면을 따라 고르게 빛을 방출하는 light 입니다.
주로 빛이 들어오는 유리창이나, 스트립 조명(strip light)를 표현할 때 사용하며, MeshStandardMaterial 이나 MeshPhysicalMaterial 만 지원하는 특징이 있습니다.
1
2
3
4
5
6
// ...생략...
const RectAreaLight = new THREE.RectAreaLight(0xffffff, 1, 12, 4);
RectAreaLight.position.set(0, 10, 0);
RectAreaLight.rotation.x(-(Math.PI * 0.5));
scene.add(RectAreaLight);
// ...생략...
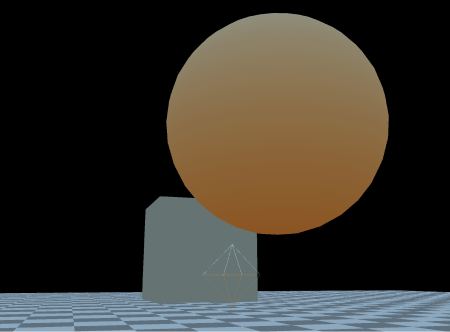
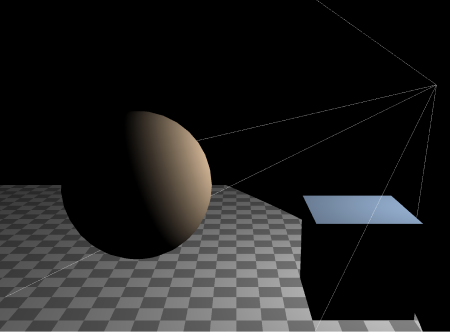
위 예시는 RectAreaLight 를 생성하여, 시계방향으로 π/2 만큼 회전시키고, y 축을 따라 10 만큼 이동시키는 코드로 결과는 아래와 같습니다.
RectAreaLight 는 DirectionalLight, SpotLight 와 달리 target 을 사용하지 않고, rotation 속성을 이용하여 회전시킬 수 있습니다.
💻 LightHelper
LightHelper 를 사용하면, Light 의 위치나, 방향과 같은 특징들을 시각화 할 수 있습니다.
❗️ GUI 툴을 통해 값을 변경할때, 변경된 값을 Helper 객체에 반영하기 위해서 update 함수를 값이 변경될때마다 실행되도록 설정해주어야 합니다. 또한 target 이 존재하는 Light 들 (DirectionalLight, SpotLight)은 Object3D 객체의 updateMatrixWorld 함수를 같이 실행시켜주어야 합니다.
👨💻 HemisphereLightHelper
마름모 모양의 mesh 를 사용하여 조명을 시각화 합니다.
1
2
3
4
// ...생략...
const hemiSphereLightHelper = new THREE.HemiSphereLightHelper(hemisphereLight);
scene.add(hemiSphereLightHelper);
// ...생략...
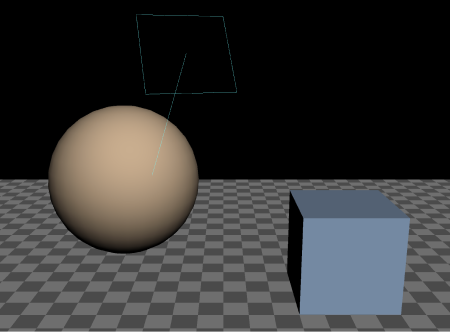
👨💻 DirectionalLightHelper
DirectionalLightHelper 는 조명을 사각형으로, 빛의 방향을 선으로 표현합니다.
1
2
3
4
5
6
// ...생략...
const directionalLightHelper = new THREE.DirectionalLightHelper(
  directionalLight
);
scene.add(directionalLightHelper);
// ...생략...
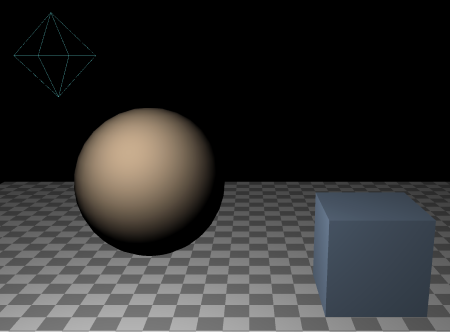
👨💻 PointLightHelper
PointLightHelper 는 빛이 시작되는 점을 다이아몬드 모양의 와이어프레임으로 표현합니다.
1
2
3
4
// ...생략...
const pointLightHelper = new THREE.PointLightHelper(pointLight);
scene.add(pointLightHelper);
// ...생략...
👨💻 SpotLightHelper
원뿔모양의 와이어프레임을 추가해 시각화 합니다.
1
2
3
4
// ...생략...
const spotLightHelper = new THREE.SpotLightHelper(spotLight);
scene.add(spotLightHelper);
// ...생략...
👨💻 RectAreaLightHelper
RectAreaLight 와 같은 크기의 사각형을 이용해 시각화합니다.
1
2
3
4
5
6
// ...생략...
import { RectAreaLightHelper } from "three/addons/helpers/RectAreaLightHelper";

const rectAreaLightHelper = new THREE.RectAreaLightHelper(rectAreaLight);
scene.add(rectAreaLightHelper);
// ...생략...
한가지 유의할 점은 RectAreaLightHelper 는 addons 에서 임포트한다는 점입니다.
💻 성능
Light 는 비용이 많이 드는 연산으로, 주의해서 사용해야하는 객체 중 하나입니다.
각 조명별 비용을 비교하면 아래와 같습니다.
AmbientLight,HemisphereLight<DirectionalLight,PointLight<SpotLight,RectAreaLight
💻 Texture에 조명 넣기
Texture 자체에 조명을 추가해 Light 를 추가한 것과 같은 효과를 주는 방법입니다.
계산에 들어가는 비용을 줄일 수 있다는 장점이 있지만, texture 의 용량이 커져 로딩시간이 늘어난다는 것과 light 를 움직일 수 없다는 단점이 존재합니다.